

A kitchen remodel doesn’t require a second mortgage. While the average kitchen renovation can run $25,000 to $50,000, homeowners who strategize can achieve meaningful transformation for a fraction of that cost. The key isn’t cutting corners, it’s knowing where to invest and where to improvise. Whether cabinets need a facelift or countertops are stuck in 1997, a budget kitchen remodel prioritizes visible impact over trendy excess. With smart material choices, selective DIY, and careful planning, it’s possible to remodel a kitchen on a budget that looks intentional, not cheap.
Table of Contents
ToggleKey Takeaways
- An affordable kitchen remodel costs $3,000–$15,000 when you prioritize visible upgrades like cabinets and countertops over trendy excess, allocating 30–40% to cabinetry and 10–15% to countertops for maximum impact.
- Painting or refinishing existing cabinets saves 80–90% compared to replacement and delivers comparable visual results when cabinet boxes are structurally sound.
- Budget kitchen remodel success depends on strategic DIY choices—paint, hardware swaps, and backsplash tiling are doable, while electrical, plumbing, and structural work require licensed professionals.
- Swap outdated fixtures like faucets ($150–$250), hardware ($60–$300), and lighting ($50–$200) to create focal points and transform dated spaces with minimal investment.
- Cost-effective countertop alternatives like laminate ($10–$40/sq ft), butcher block ($30–$70/sq ft), and large-format tile minimize expenses while maintaining aesthetic appeal.
- Shop smart by exploring Habitat for Humanity ReStores, floor models, scratch-and-dent outlets, and local tile suppliers to source quality materials and appliances at 20–50% discounts.
Set a Realistic Budget and Prioritize Your Upgrades
Before pulling a single cabinet knob, establish a firm number and stick to it. A realistic budget for a cheap kitchen remodel typically falls between $3,000 and $15,000, depending on kitchen size and scope. Break that total into categories: cabinetry (30–40%), countertops (10–15%), flooring (10%), appliances (15–20%), labor (20–35%), and contingency (10%). The contingency isn’t optional, it covers the rotted subfloor discovered under the sink or the electrical outlet that isn’t up to code.
Prioritize upgrades by visibility and function. Cabinets dominate sightlines, so they deserve the largest allocation. Countertops come next. Flooring can wait if the existing surface is serviceable. Appliances should be replaced only if they’re nearing end-of-life or egregiously outdated. A working 1990s refrigerator isn’t pretty, but a fresh coat of stainless steel contact film buys time until a sale.
Document everything in a spreadsheet: line items, estimated costs, actual costs, and receipts. This prevents budget creep and keeps decision-making objective. If the tile backsplash blows the budget, cut it and paint instead. The goal is a finished kitchen, not a half-done showpiece.
Refinish or Paint Cabinets Instead of Replacing Them
New cabinets can consume half a remodel budget. Refinishing or painting existing boxes costs 80–90% less and delivers comparable visual impact, if the cabinet boxes are structurally sound. Check for water damage, sagging shelves, and failed hinges. If the frames are solid wood or plywood (not particleboard that’s swollen from moisture), they’re candidates for a refresh.
Painting cabinets requires proper prep. Remove doors and drawer fronts, then label everything with painter’s tape and a numbering system. Clean all surfaces with TSP (trisodium phosphate) to remove grease and grime: kitchen cabinets accumulate a surprising film. Sand with 120-grit paper to degloss and create tooth for the primer. Wipe dust with a tack cloth.
Prime with a bonding primer like Zinsser B-I-N or KILZ Adhesion. These grip slick surfaces and block tannin bleed from wood. Two coats of a durable paint follow, alkyd (oil-based) enamels level beautifully but require mineral spirits for cleanup and longer dry times. Water-based alternatives like Benjamin Moore Advance or Sherwin-Williams ProClassic cure hard and clean up with soap and water. Use a foam roller for flat surfaces and a 2-inch angled brush for details. Allow 24 hours between coats and a full week of cure time before reattaching hardware.
For wood cabinets worth showcasing, refinishing beats paint. Strip old finish with a chemical stripper (work outdoors or with serious ventilation and neoprene gloves), sand through grits up to 220, then apply stain and a protective topcoat like polyurethane or hard wax oil. Budget three weekends for an average kitchen.
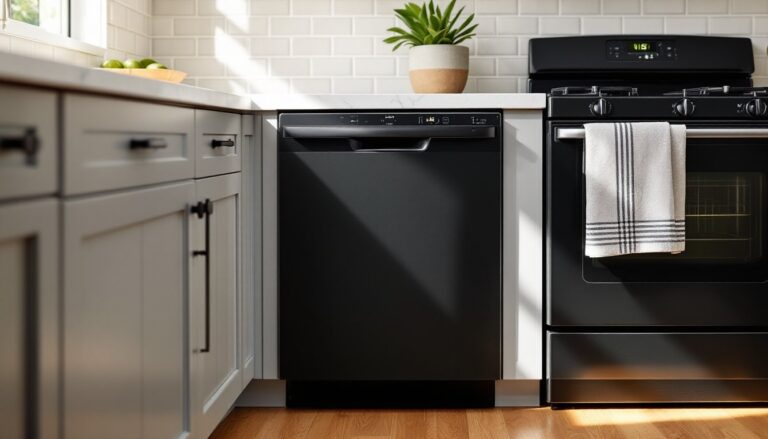
Update Hardware, Fixtures, and Lighting for Maximum Impact
Swapping cabinet hardware is the fastest facelift in the budget kitchen remodel playbook. Knobs run $2–$10 each: pulls cost $3–$15. For a kitchen with 20 doors and 10 drawers, expect $60–$300 total. Choose a finish that complements faucets and appliances, brushed nickel, matte black, and oil-rubbed bronze all hide fingerprints better than polished chrome.
If existing hardware leaves visible holes that the new pieces won’t cover, fill old holes with wood filler or auto body filler, sand smooth, and touch up paint before installing new hardware. For mismatched hole spacing, drill carefully with a template jig and a sharp bit to avoid tear-out.
Faucets make an outsized impact. A builder-grade chrome faucet screams rental: a $150–$250 pull-down model in a modern finish transforms the sink into a focal point. Look for solid brass bodies and ceramic disc valves, they last. Installation is straightforward if supply lines and the shutoff valves are accessible. Turn off water, disconnect old lines, remove the mounting nuts from below (a basin wrench helps in tight spaces), and reverse the process for the new unit. If shutoffs are corroded or missing, add quarter-turn ball valves while you’re under there: it’s cheap insurance.
Lighting upgrades extend to task, ambient, and accent layers. Swapping a dated flush-mount ceiling fixture for a modern semi-flush pendant or linear LED fixture costs $50–$200 and takes 20 minutes. Under-cabinet LED strip lights or puck lights improve visibility on countertops and cost $30–$100 per run. Hardwiring requires basic electrical skills: plug-in versions are simpler but less clean. If the kitchen has recessed cans, retrofit LED trim kits drop energy use and improve color rendering. Always turn off power at the breaker before touching wiring.
Choose Cost-Effective Countertop and Backsplash Options
Granite and quartz are beautiful, but they’re not the only options. Laminate countertops have evolved beyond the 1980s beige, modern laminates mimic stone and concrete convincingly and cost $10–$40 per square foot installed, versus $50–$100+ for stone. Brands like Wilsonart and Formica offer dozens of edge profiles and patterns. Laminate won’t handle hot pots directly and can chip at seams, but for budget kitchen remodel ideas, it’s hard to beat the price-to-looks ratio.
Butcher block is another affordable play at $30–$70 per square foot. Birch and oak are common: walnut costs more. Butcher block requires sealing with mineral oil or a food-safe finish and periodic maintenance, but it’s repairable and adds warmth. Don’t install it next to the sink without a solid waterproofing plan, prolonged moisture causes swelling.
Tile countertops fell out of favor due to grout maintenance, but large-format porcelain tiles (12×24-inch or larger) minimize grout lines. Pair with epoxy grout for stain resistance. DIYers comfortable with a wet saw and level can install tile for $5–$15 per square foot in materials. For a backsplash, subway tile remains a classic at $1–$5 per square foot. Peel-and-stick tiles run $10–$25 per panel and install in an afternoon, though longevity and heat resistance vary, keep them away from the range.
If the existing countertops are laminate in decent shape, consider a refinishing kit like Rust-Oleum Countertop Transformations or a concrete overlay. Results vary with prep quality, but the cost is under $200 for an average kitchen.
DIY Where You Can and Hire Pros Where It Matters
Labor often accounts for a third of remodeling costs, so sweat equity saves real money. Paint, hardware swaps, backsplash tiling, and light fixture installation are all within reach of a careful DIYer with basic tools and YouTube. Cabinet painting is tedious but not complex. Demolition, ripping out old countertops, removing tile, pulling up flooring, requires only a pry bar, hammer, and a dumpster.
But some tasks demand professionals. Electrical work beyond fixture swaps, adding circuits, relocating outlets, upgrading the panel, requires a licensed electrician and often a permit. Same for plumbing that involves moving drain lines or gas connections. If the project includes structural changes (removing a wall, even a non-load-bearing one), consult an engineer or contractor to verify framing, headers, and code compliance. Countertop templating and installation for stone or quartz should be left to fabricators with the tools and experience to avoid costly cracks.
Homeowners exploring home renovation cost guides often underestimate how much DIY time a project consumes. A realistic DIYer can paint cabinets over two weekends, but a full kitchen, cabinets, walls, ceiling, trim, can stretch to a month of evenings and weekends. Factor this into planning. If the kitchen is the household’s only cooking space, speed matters. Hiring out cabinet painting or countertop install can shave weeks off the timeline and preserve sanity.
For tasks in the middle, like installing a tile backsplash or laying luxury vinyl plank flooring, assess skill and tool access honestly. A wet saw rental runs $50–$75 per day: buying one costs $100–$300. If the tile job is small, renting makes sense. If it’s the whole floor and three bathrooms, buying pays off.
Shop Smart: Where to Find Discounted Materials and Appliances
Materials and appliances don’t need to come from big-box stores at full retail. Habitat for Humanity ReStores sell donated cabinets, countertops, sinks, light fixtures, and appliances at a fraction of new cost. Inventory is unpredictable, but patient shoppers find solid wood cabinets, farmhouse sinks, and even stainless steel appliances in working condition.
Many DIY enthusiasts share budget home renovation stories that highlight salvage yards, estate sales, and Craigslist as goldmines for hardware, vintage lighting, and cabinetry. Always inspect used appliances in person and test if possible. Check model numbers against recall databases. For new appliances, floor models and scratch-and-dent outlets offer 20–50% discounts on cosmetic imperfections that don’t affect performance. A dent on the side panel of a dishwasher that will be hidden by cabinetry is irrelevant.
Online retailers like Wayfair, Overstock, and Build.com run frequent sales on faucets, sinks, lighting, and hardware. Compare shipping costs, a $120 faucet with $40 shipping isn’t a deal. Manufacturer rebates and holiday sales (Memorial Day, Black Friday, end-of-year clearances) can shave hundreds off appliance packages. Costco and Sam’s Club sometimes bundle appliances with extended warranties at competitive prices.
For tile, flooring, and countertops, check local suppliers and wholesalers. Some sell to the public and beat big-box pricing, especially on remnant slabs of quartz or granite, leftover pieces from larger jobs that are perfect for small kitchens. Always order 10–15% extra for cuts, waste, and future repairs. Tile and flooring dye lots vary: matching a discontinued product three years later is nearly impossible.
Conclusion
An affordable kitchen remodel isn’t about accepting less, it’s about spending smarter. Painted cabinets, updated hardware, and cost-effective countertops deliver transformation without the five-figure invoice. DIYers who prep thoroughly, prioritize visible upgrades, and know when to call a pro can remodel a kitchen on a budget that feels intentional and looks finished. The result is a space that works better, looks sharper, and proves that budget constraints can drive creativity rather than compromise.